How To Add A Post Rating System in WordPress

In this article, we will explain how to add a post-rating system in WordPress using the WP-PostRatings plugin.

One major feature that many bloggers like to add to their WordPress site is a post rating system. A post rating system allows visitors to rate your posts, providing feedback and creating engagement.

A post-rating system is a great way to engage your readers and get valuable feedback on your content. It allows users to rate your posts and leave their comments, giving you an insight into what your audience thinks about your work.

First you need to install and active plugin in your website 

Step 1: Install and Activate WP-PostRatings Plugin

To get started, you need to install and activate the WP-PostRatings plugin on your WordPress website. You can do this by going to the “Plugins” section in your WordPress dashboard and clicking on “Add New.” In the search bar, type in “WP-PostRatings,” and the plugin should appear in the results. Click on “Install Now” and then “Activate” to activate the plugin.

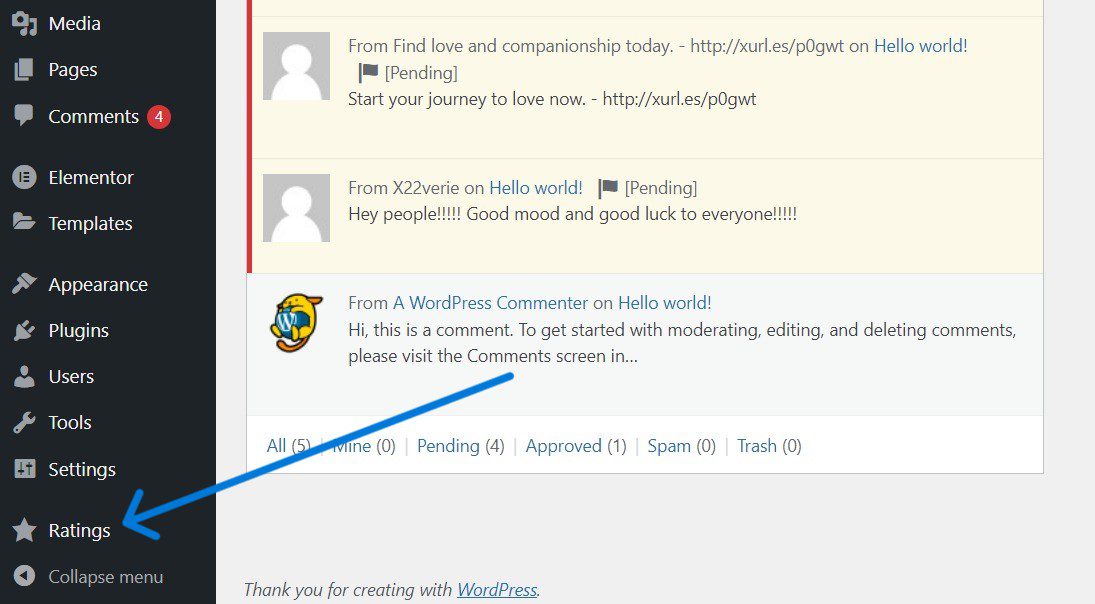
After activating the WP-PostRatings plugin will appear here Here, you can customize the rating icons, choose the location of the rating widget, and set the rating options.

Step 2: Configure the Plugin Settings

Once the plugin is activated, you will be redirected to the plugin’s settings page. You can also select the post types on which you want to display the rating system.

By default, the plugin is enabled for posts and pages, but you can choose to add it to custom post types as well.

Step 3: Add Rating Widget to Your Posts

To add the rating widget to your posts, you need to go to the “Appearance” tab in your WordPress dashboard and click on “Widgets.” From the available widgets list, drag and drop the “WP-PostRatings Widget” to the sidebar or any other widgetized area of your website.

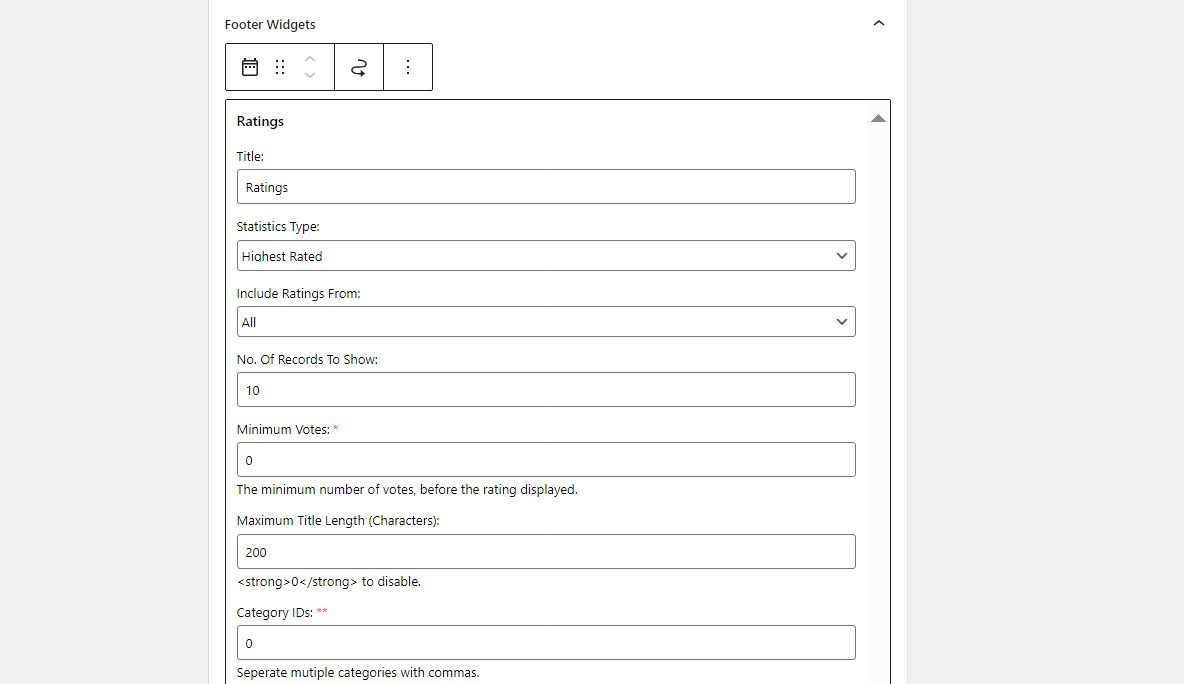
Drag and drop the “WP-PostRatings Widget” to the sidebar, footer any other widgetized area of your website.

Configure ratings with various options including Title, Statistics Type (Highest Rated), and the ability to include ratings from all categories. Set the number of records to display and define a minimum vote count before ratings are shown. Adjust the maximum title length (set to 0 to disable). Specify Category IDs separated by commas, and choose a time range using values like ‘1 day’, ‘2 weeks’, or ‘1 month’ to fine-tune your data display.

Step 4: Customize the Rating Icons

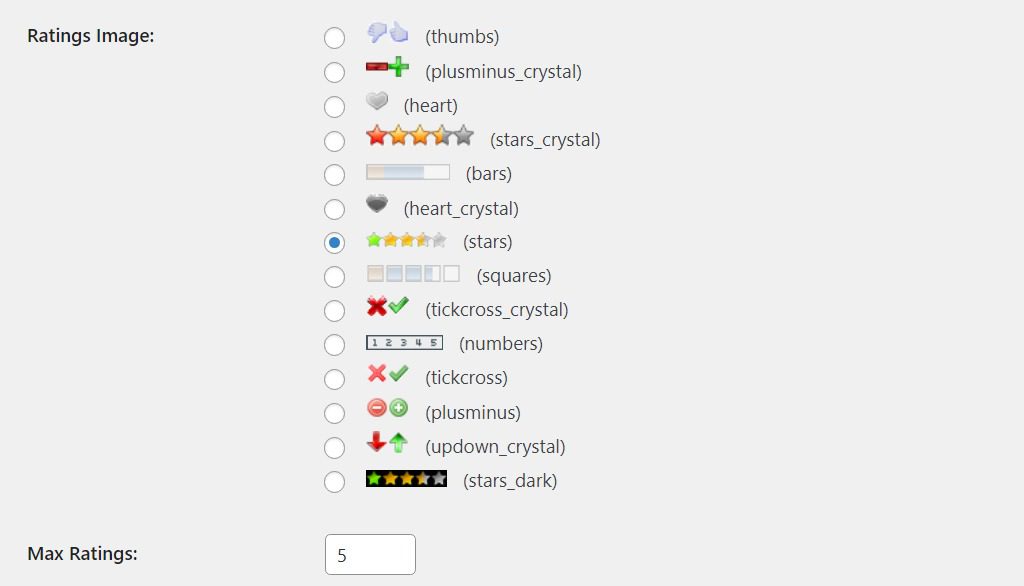
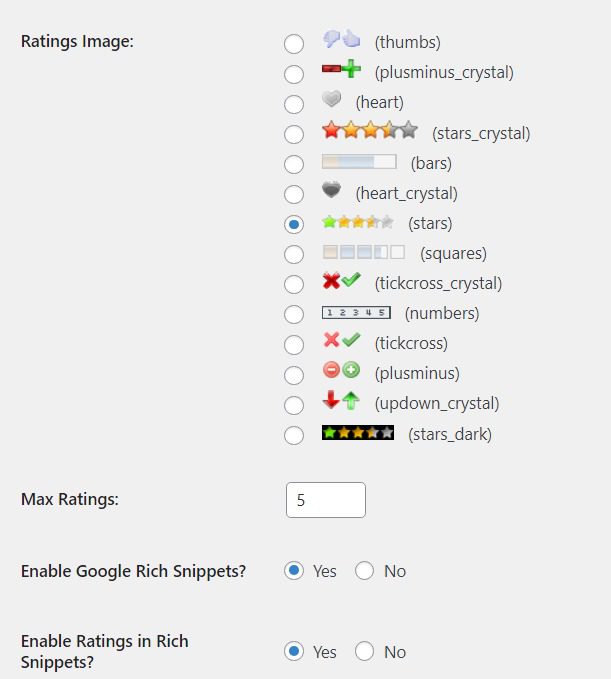
By default, the plugin comes with five different rating icons. However, you can also upload your custom icons or choose from the available icon sets provided by the plugin. To do this, go to the “WP-PostRatings” tab in your WordPress dashboard and click on Icon Sets.

Here, you can select the icon set you want to use for your ratings.

Step 5: Customize the Display of Ratings

WP-PostRatings also allows you to customize the look and feel of your rating widget. You can change the colours, fonts, and overall design of the rating icons to match your website’s branding. 

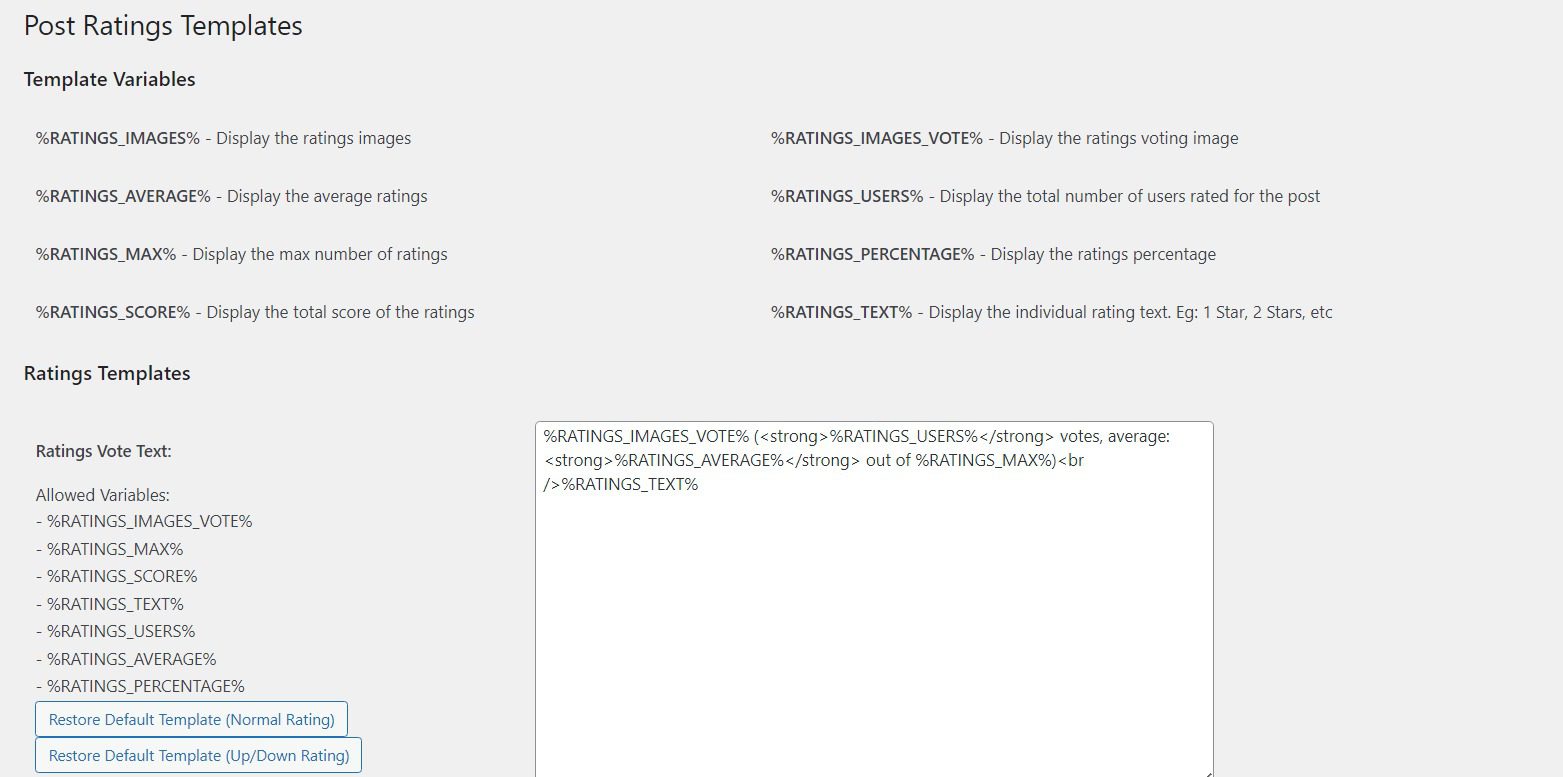
To do this, go to the “WP-PostRatings” tab and click on “Templates.” Here, you can select the template you want to use for the rating widget and make any necessary changes.

Adding a post rating system in WordPress with WP-PostRatings is a simple and effective way to engage your readers and get valuable feedback.

It only takes a few simple steps to set up and can greatly improve the user experience on your website. So, go ahead and give it a try, and see the positive impact it can have on your blog or website.

Leave a Reply

Your email address will not be published. Required fields are marked *

Share via
Copy link
Powered by Social Snap