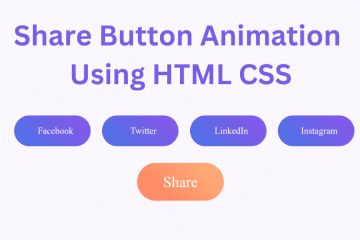
Buttons are one of the most important elements of any website, serving as gateways for user interaction. Whether it’s a call-to-action button, a menu button, or even a social media button, adding visual appeal can greatly enhance user engagement. One such way to do this is through the Shining Button Hover Effect, a simple yet visually striking CSS effect that adds a sleek animation to your buttons.
Shining Button Hover Effect is a popular design technique that adds a touch of shine or sparkle to any button when a user hovers over it. This effect is achieved using a combination of HTML and CSS, making it simple to implement and customize for any website.
How to Create a Shining Button Hover Effect
In this article, we will learn how to create a Shining Button Hover Effect using HTML & CSS simple step-by-step process of creating a Shining Button Hover Effect using HTML and CSS, as well as its benefits and some tips for customization.
Step-by-step process of creating a Shining Button Hover Effect using HTML and CSS
Create a Folder: Start by creating a folder for your project. You can name it anything you like. Inside this folder, you’ll need to create the following files:
- index.html (for the structure of your Shining Button)
- style.css (for styling the Shining Button)
Create the HTML File:
- Name your HTML file index.html.
Create the CSS File:
- Name your CSS file style.css.
Step 1: Setting up the HTML Structure
The first step to creating a Shining Button Hover Effect is to set up the HTML structure for the button. This includes creating a button element within a container.
					<!DOCTYPE html>
<!-- NotArena || www.NotArena.com -->
<html lang="en">
<head>
    <meta charset="UTF-8">
    <meta name="viewport" content="width=device-width, initial-scale=1.0">
    <title>Buttons Shining Hover</title>
    <link rel="stylesheet" href="style.css">
<style id="wpr-lazyload-bg-container"></style><style id="wpr-lazyload-bg-exclusion"></style>
<noscript>
<style id="wpr-lazyload-bg-nostyle">.elementor-1911 .elementor-element.elementor-element-2e43d051::before, .elementor-1911 .elementor-element.elementor-element-2e43d051 > .elementor-background-video-container::before, .elementor-1911 .elementor-element.elementor-element-2e43d051 > .e-con-inner > .elementor-background-video-container::before, .elementor-1911 .elementor-element.elementor-element-2e43d051 > .elementor-background-slideshow::before, .elementor-1911 .elementor-element.elementor-element-2e43d051 > .e-con-inner > .elementor-background-slideshow::before, .elementor-1911 .elementor-element.elementor-element-2e43d051 > .elementor-motion-effects-container > .elementor-motion-effects-layer::before{--wpr-bg-d7fea77e-d4c5-46db-a8ef-8f5140363947: url('https://notarena.com/wp-content/uploads/2024/10/BG.png');}.lazyloading{--wpr-bg-4584e0d6-6634-4339-b5f6-fef61342a34c: url('https://notarena.com/wp-content/plugins/wp-smushit/app/assets/images/smush-placeholder.png');}</style>
</noscript>
<script type="application/javascript">const rocket_pairs = [{"selector":".elementor-1911 .elementor-element.elementor-element-2e43d051, .elementor-1911 .elementor-element.elementor-element-2e43d051 > .elementor-background-video-container, .elementor-1911 .elementor-element.elementor-element-2e43d051 > .e-con-inner > .elementor-background-video-container, .elementor-1911 .elementor-element.elementor-element-2e43d051 > .elementor-background-slideshow, .elementor-1911 .elementor-element.elementor-element-2e43d051 > .e-con-inner > .elementor-background-slideshow, .elementor-1911 .elementor-element.elementor-element-2e43d051 > .elementor-motion-effects-container > .elementor-motion-effects-layer","style":".elementor-1911 .elementor-element.elementor-element-2e43d051::before, .elementor-1911 .elementor-element.elementor-element-2e43d051 > .elementor-background-video-container::before, .elementor-1911 .elementor-element.elementor-element-2e43d051 > .e-con-inner > .elementor-background-video-container::before, .elementor-1911 .elementor-element.elementor-element-2e43d051 > .elementor-background-slideshow::before, .elementor-1911 .elementor-element.elementor-element-2e43d051 > .e-con-inner > .elementor-background-slideshow::before, .elementor-1911 .elementor-element.elementor-element-2e43d051 > .elementor-motion-effects-container > .elementor-motion-effects-layer::before{--wpr-bg-d7fea77e-d4c5-46db-a8ef-8f5140363947: url('https:\/\/notarena.com\/wp-content\/uploads\/2024\/10\/BG.png');}","hash":"d7fea77e-d4c5-46db-a8ef-8f5140363947","url":"https:\/\/notarena.com\/wp-content\/uploads\/2024\/10\/BG.png"},{"selector":".lazyloading","style":".lazyloading{--wpr-bg-4584e0d6-6634-4339-b5f6-fef61342a34c: url('https:\/\/notarena.com\/wp-content\/plugins\/wp-smushit\/app\/assets\/images\/smush-placeholder.png');}","hash":"4584e0d6-6634-4339-b5f6-fef61342a34c","url":"https:\/\/notarena.com\/wp-content\/plugins\/wp-smushit\/app\/assets\/images\/smush-placeholder.png"}]; const rocket_excluded_pairs = [];</script></head>
<body>
    <div class="container">
        <a href="#" class="btn green">Green Button</a>
        <a href="#" class="btn blue">Blue Button</a>
    </div>
<script>var rocket_beacon_data = {"ajax_url":"https:\/\/notarena.com\/wp-admin\/admin-ajax.php","nonce":"151665f498","url":"https:\/\/notarena.com\/code-library\/shining-button-hover-effect-using-html-css","is_mobile":true,"width_threshold":393,"height_threshold":830,"delay":500,"debug":null,"status":{"atf":true,"lrc":true},"elements":"img, video, picture, p, main, div, li, svg, section, header, span","lrc_threshold":1800}</script><script data-name="wpr-wpr-beacon" src='http://notarena.com/wp-content/plugins/wp-rocket/assets/js/wpr-beacon.min.js' async></script></body>
</html>
Step 2: Adding the Styles for the Button
We need to set the initial styles for the button. These can include background colour, font size, and other basic styles. For this effect, we will also add a box shadow to the button to give it a three-dimensional look.
					body {
  display: flex;
  justify-content: center;
  align-items: center;
  height: 100vh;
  background-color: #f0f0f0;
  font-family: Arial, sans-serif;
}

.container {
  display: flex;
  gap: 20px;
}

.btn {
  position: relative;
  display: inline-block;
  padding: 15px 30px;
  font-size: 18px;
  color: white;
  text-transform: uppercase;
  text-decoration: none;
  letter-spacing: 2px;
  overflow: hidden;
  transition: 0.5s;
  border-radius: 30px;
  z-index: 1;
}

.btn.green {
  background-color: #4CAF50;
}

.btn.blue {
  background-color: #2196F3;
}

.btn::before {
  content: '';
  position: absolute;
  top: 0;
  left: -100%;
  width: 300%;
  height: 100%;
  background: rgba(255, 255, 255, 0.3);
  transform: skewX(-45deg);
  transition: 0.5s;
  z-index: -1;
}

.btn:hover::before {
  left: 100%;
}

.btn:hover {
  box-shadow: 0 0 20px rgba(0, 0, 0, 0.2);
}
You can customize the button by changing the colours and box-shadow to match your website’s colour scheme. This will make the button more cohesive with the overall design.
The Shining Button Hover Effect is a simple yet effective design technique that can add a touch of sparkle to any website’s buttons. By following the steps outlined in this article, you can easily create your own shining buttons using HTML and CSS. So, go ahead and give your buttons that extra shine they need to stand out!
- Like
- Digg
- Del
- Tumblr
- VKontakte
-
- Buffer
- Love This
- Odnoklassniki
-
- Meneame
- Blogger
- Amazon
- Yahoo Mail
- Gmail
- AOL
- Newsvine
- HackerNews
- Evernote
- MySpace
- Mail.ru
- Viadeo
- Line
- Comments
- Yummly
- SMS
- Viber
-
- Subscribe
- Skype
- Facebook Messenger
- Kakao
- LiveJournal
- Yammer
- Edgar
- Fintel
- Mix
- Instapaper
- Copy Link


